Nav-pilot nav

Nissan Navara Forum

Help Support Nissan Navara Forum:

This site may earn a commission from merchant affiliate links, including eBay, Amazon, and others.

nav-pilot

Member
Joined
Dec 2, 2008
Messages
85
Reaction score
0
Location
Adelaide
Just trying to see if i am uploading pics right
 

Attachments

  • nav.jpg
    nav.jpg
    131.2 KB · Views: 26,812
Looks like i got it right.
A bit about the nav.
Started of as a bog standard navara 2 years ago that i purchased that was 12 months old with 10,000kms.
Since then I removed the tub & put a ali tray on with steel bracing underneath.
Under the tray there is a 60 litre water tank & a 1200mm deep draw.
There are also a pair of 24 litre air tanks hooked up to a 3cfm compressor behind the back seat.
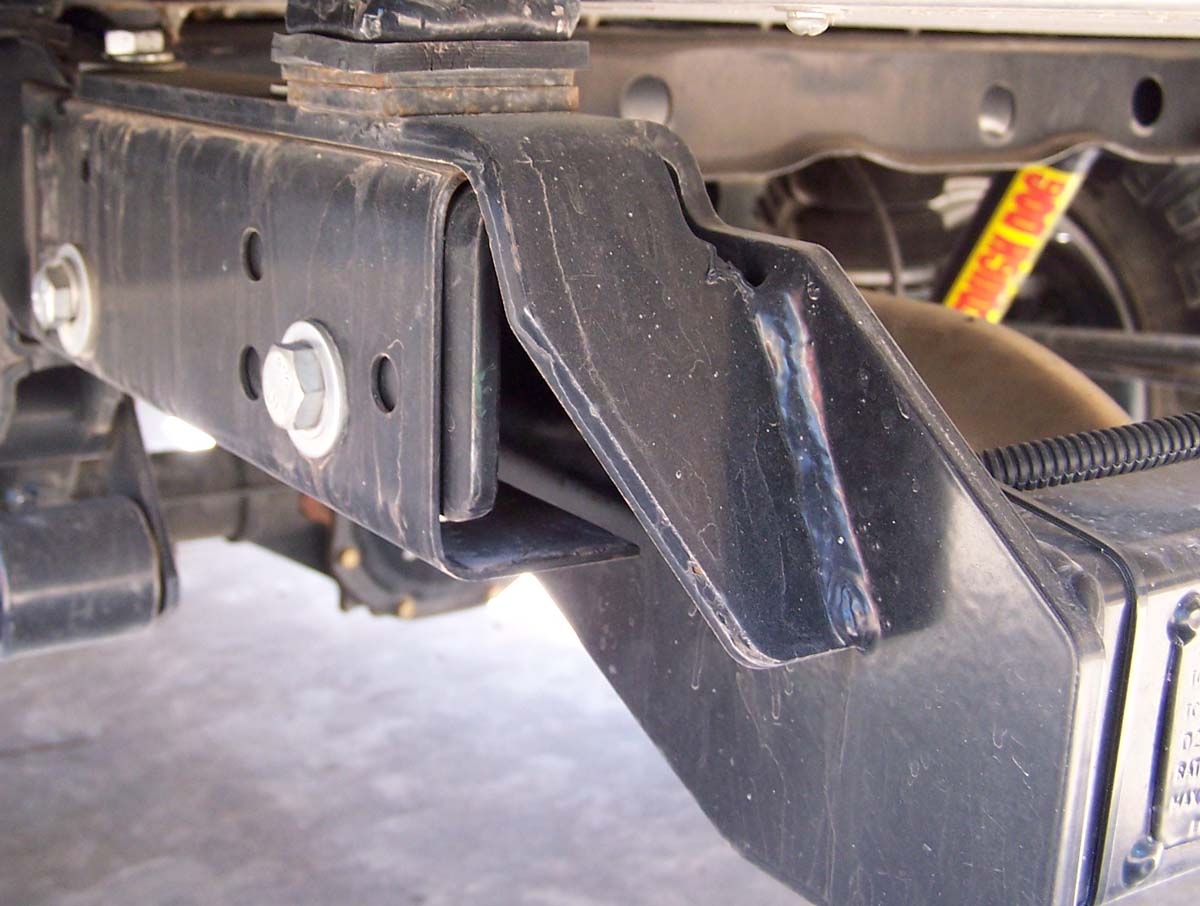
I have also raised the rear towbar about 75mm for a bit more clearance.
Also i have made a slide on camper to hold all my fridge, stove, Draws etc.
Suspension wise i have just wound the front up & have pedders shocks, On the rear by removing the tub i gained about a 1 1/2' lift & since then i put superior extended shackles and pro bag air bags to keep the height when the camper is slid on. Also tough dog adjustable rear shocks.
Performance wise i have a beaudesert 2 3/4 dump pipe & then a full 1 piece mandrel bent stainless steel exhaust with high flow cat & 1 straight through muffler. I have also put a dp chip on wound up to the number 9 setting. (see my dyno results in my garage)
Wheel wise they are standard size sunrasias with 265 / 75 / 15 m/t mtz tyres.
I also run a exide sealed dual battery under the bonnet.
In the cab there is a egt & boost gauge to keep an eye on whats happening.
I also have a tyre pressure monitor system & a boggard turbo timer.
Entertainment wise there is a flip up dvd in the dash with reversing camera and a flip down dvd player on the roof for the rug rat in the back.
There is also a gme uhf in the dash for communications.

I have a few more things planed for the nav like lockers.
trips we have been on include Cape york, Vic high country, Flinders rangers, Googs track, & come july we are of to the kimberlies.
Cheers Guys
 
Very tidy mate!!
If you can, would it be possible to explain and maybe post some pic's of how you raised the tow bar. This is something that has annoyed me about my set up ie. the departure angle is greatly reduce with the factory assembly. Have had a few ideas on this but no one I have spoken to can give me an answer

Cheers Brad
 
Hi Nevyn.
With raising the towbar it was fairly simple.
I actually did mine about 18 months ago so i am trying to remember everything that i did.
Bassically i just sat the towbar on top of the chassis rail instead of it sitting it on the bottom of the chassis rail.
With the angle steel supports swap the left one to the right & the right one to the left.
I had to weld up some of the origanal holes in the towbar & support angles as they fowled with my tray support rails.
But by welding these up you can redrill the holes to suit the holes in your chassis.
That was bassically what i did.
I did mine when i removed the tub and put the tray on so it was very easy to get to everything and mark holes & drill etc.
Hope this helps anybody that wants to also do theres.
See Pic Attached)

towbar1.jpg
 
Thank's mate, the picture answers all the questions I had! Now if only I had some time!!!

Cheers Brad
 
Thought i would post some more pics up if anybody was interested.
These are a few from at home all clean.
1 nav side.jpg

2 nav back.jpg

3 nav front shed copy.jpg

4 nav side back.jpg

5 nav draw.jpg
 
A few more

2nd battery exide orbital controlled with baintech controller system
6 nav 2nd battery.jpg
24 litre air tank, another on the other side. all hooked together and plug in out lets either side for air hose.
7 nav air tank.jpg
Rear draw & towbar raised from bottom of chassis to top of chassis, about 90mm
8 nav rear draw & towbar raised.jpg
Under bonnet
9 nav motor.jpg
3cfm compressor switched from drivers seat & regulated with a 100psi pressure switch. Works great for pumping tyres up.
10 nav compressor.jpg
 
Beaudesrt 2 3/4" dump pipe
11 nav dump pipe.jpg
3" stainless exhaust with high flow cat & small straight through muffler.
12 nav exhaust.jpg
Superior Engineering idler arm brace
13 nav idler arm brace.jpg
Superior Engineering extended greasable shackles
14 rear ext shackles 2.jpg
Dyno chart of torque (first line with exhaust only) (second line with dp chip on no9)
15 nav dyno 1.jpg
 
Dyno chart KW first line with exhaust only, Second line with dp chip on no 9 setting.
16 nav dyno 2.jpg
Thought a few of you might be interested in the slide on canopy i made for trips away.
Under tray draw near completion and frame nearly finished.
17 nav canopy 1.jpg
Canopy frame all welded up.
18 nav canopy 2 copy.jpg
Canopy frame with sparewheels on.
19 nav canopy 3.jpg
Canopy clad ready for internals to be finished. I have now changed the spare wheel location to just one on top up the front.
There was to much canterleir weight with the wheels right at the back.
20 nav canopy 4.jpg
 
That looks really really slick. Shame about the spare wheels, they look good as mounted on the back.
 
And the last lot for Navara Cruz to show that it does get dirty. It just gets a good clean when it comes home.

Relaxing up at musgrave station before going on the telegraph track (cape York)
22 nav cape york 1.jpg
Testing the snorkel out on Nolans Brook
23 nav cape york 2.jpg
On the trip up going through the car wash at inaminca
24 nav cape york 3 copy.jpg
Gun shot comimg down
25 nav cape york 4 copy.jpg
Gun shot going up. Had so much fun coming down we turned around & did it all again.
26 nav cape york 5.jpg

If any body hasn't been up to Cape York yet put it on your list of things to do.
We travelled from Adelaide /Cape York / Adelaide in 4 1/2 weeks. 11,000 kms return trip.
The nav didn't even have a hicup the hole trip.
 
Shit mate, that is one nice truck.

Awesome love it, what else you got on the wish list.

Dave.
 
I'm with everyone else, an absoloute shit hot setup, I love it. Mine is kind of simular but not if that makes sense. I wish my 2nd battery wiring was as neat as yours......one day.
 

Latest posts

Back
Top