sparras build

Nissan Navara Forum

Help Support Nissan Navara Forum:

This site may earn a commission from merchant affiliate links, including eBay, Amazon, and others.
Hey Sparra,

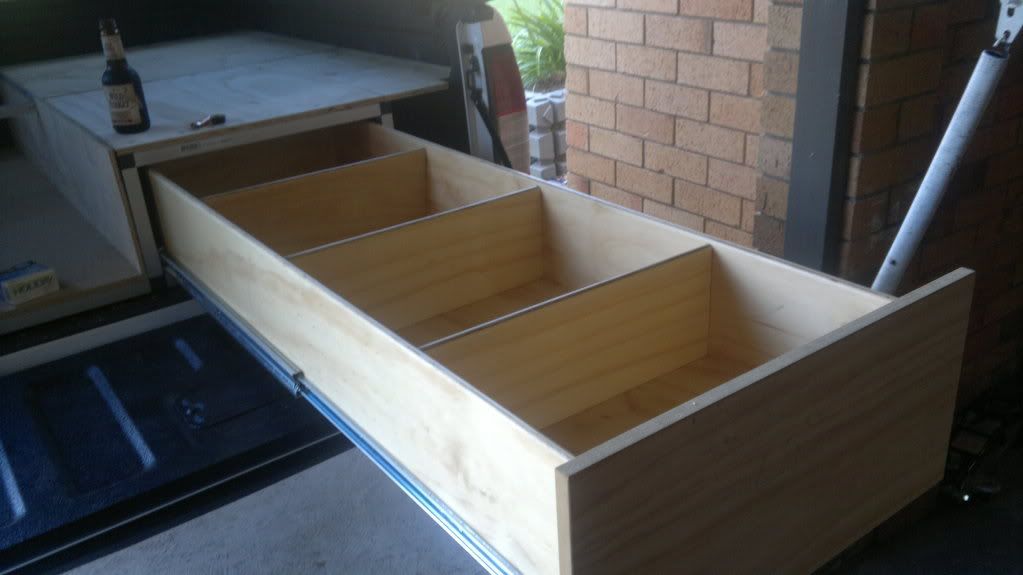
Been reading with interest your build thread, you've done an awesome job mate!

I'm looking at building some drawers like yours, you mentioned if you did it again you'd use different stuff so as not to lose so much room. Just wondering what you would go for instead? Same type of tube with plastic connectors but smaller or something totally different altogether?

Anything else you'd do differently?

Thanks in advance, forums are awesome for standing on the shoulders of giants that have come before us :)

Cheers,

-scott
 
Last edited:
Gee I miss my ute
I see it occasionally
If I was to build another set of draws I would use 16mm and 12mm ply
Cheers
 
Hey Sparra, I can't believe how much alike our navaras are. Looking at your last post it looks like you no longer own it. What do you have now?
I will get to doing a build tread on mine one day. Very time consuming and struggle for time sometimes.
Cheers. Brad.
 
Gee I miss my ute
I see it occasionally
If I was to build another set of draws I would use 16mm and 12mm ply
Cheers

G'day sparra,

On your recommendation I've been hunting around for 16mm alloy rhs and although I can find it there is nothing like that which has the plastic connectors (I found another system similar to connect-it called Qubelok but it is 25mm as well).

Any thoughts on how you would proceed? Would you try brazing the aluminium instead of the plastic connectors ? (probably just tripled the project time if I do that).

Maybe I'll have to settle for the 25mm system.... :(

-Scott
 
the 25mm system from bunnings is fine
I wouldn't attempt to weld it , you will be there forever
 
You should do up a "little susie" thread mate, you could even add a mini draw in the back, but only one lol
 
You should do up a "little susie" thread mate, you could even add a mini draw in the back, but only one lol

:reddy::thefinger:

if I built the suzy up you guys would ban me cause ide be showing you up out on the tracks all the time:ha:
 
Last edited:
the 25mm system from bunnings is fine
I wouldn't attempt to weld it , you will be there forever

Bunnings call it connect-it Capral call it Qubelok.

Checked prices at bunnings which seemed very high, approx $11.50 per metre for the 25.4mm box

Just called around and Capral (CAMPBELLFIELD, VIC) have it in 6.5M lengths for $15 which includes cutting it in half for transport!!! All the connectors are slightly cheaper as well. Given that I'm going to need about 24M it's a saving of $240.

Certainly pays to shop around sometimes.....
 
Help with drawers...

andrew (blacknav) fitted the drawer today and that allowed me to start finishing tray setup
still got a fair bit to do
04022012455.jpg


04022012457.jpg

thanks andrew

G'day Sparra,

I'm about half way through building these drawers but have hit a couple of snags.

Firstly, if you screw the ply to the top of the aluminium box before the carpet gets glued to the ply obviously if you ever want to remove the ply you'd have to peel back the carpet.... So did you carpet the ply in place once it had been screwed to the aluminium? (and just hope you never want to unscrew it?)

Secondly, my frame looks like Trent Naudi's

image_zpsf7791089.jpg


(only difference is I don't have space for front jerry cans my compartment extend right to the front for dual batteries like yours) I realise now I should have gone with your type of design and just screw aluminium angle to the tub side walls and have the ply sit on that (did you screw it?). Because with the design above I can't make use of all the space width ways as the unit doesn't fit into the tub in one piece. Not sure if there'd be enough flex for me to have one piece in the tub and then add one of the wings one it was in... And if I did that stuffed if I'd be able to get it back out again..... Worst case scenario I'll shorten the width of the wings so it doesn't finish flush with tub wall...

Any advice much appreciated....

-Scott

P.S: Should I have started a seperate thread to ask this or is asking in your build thread ok?
 
Last edited:
Hey mate
I dry fitted and screwed floor down, in 3 sections
I then removed and carpeted, then screwed through carpet and used cup washers
It made it easy to remove
Why not start your own diy drawer build thread?
Cheers
 
Hi Sparra,

Thanks for getting back to me mate.

Hey mate
I dry fitted and screwed floor down, in 3 sections

When you say screwed the floor down, do you mean screwed the frame for the entire thing to the chassis (with tek screws like you mentioned?) And when you say 3 seperate sections you assembled the frame / inserted into tub in 3 seperate sections or you're referring to the fact you used 3 bits of aluminium angle to screw the frame down?

I then removed and carpeted, then screwed through carpet and used cup washers

Ok that makes sense then, you use cup washers so you can have the screws exposed on the topside of carpet but don't catch on anything? (I've never seen / used them before)


Why not start your own diy drawer build thread?

I think I will... it'll help me keep track of all the confusion / trying to work out the best way to do stuff.

Thanks again,

-Scott
 
when I say screwed down in 3 sections I mean the ply floor was cut in 3 sections then screwed to TOP of drawer frame

I also screwed the frame to tub floor

cheers
 
Hey Sparra, got a question mate, bought some iron man Bach plate (supposedly for D22) fitted up the rear two no problem (oil drain hole isn't even close) front plate not so much, my recovery points will have to stay off as the plate sit over the top. Have to say not 100% happy with them as iv had to also cut and modify the front plate.
Still have yet to fit one with an alloy bar. Was wondering if u had any more tips??


Hey onemofo,

I haven't even attempted to fit those ones I picked up from Kyabram as I have to fix a couple of leaks first. Any tips or pics that might help me before I have a crack?

Cheers,

-scott
 
yeah it's pretty straight forward, especially the rear and middle plates, (drain hole doesn't come close to lining up) cut a new drain hole after measuring it (best to do same as Sparra has) I will once I get down to the work shop at home in a few weeks. issues are with the front plate. Not sure what model it's for but it's not D22 iv had to shorten the actual plate by about and inch maybe two and tuck it under the factory one I have on the steel bar, I drilled through the two and bolted them together and into the mounting bracket from the original plate. Hope that makes sense.
 
I had to make extensive mods to the front plate to get the 2 recovery points on
The other 2 plates were easy bolt ups and a hole for oil changes
 
I had to make extensive mods to the front plate to get the 2 recovery points on

The other 2 plates were easy bolt ups and a hole for oil changes


I can get then on but they would be pointless as they would be behind the bash plate. So annoyed. My mate has TJM on his D22 and they are awesome.
 

Latest posts

Back
Top