Chris's D21 thingo

Nissan Navara Forum

Help Support Nissan Navara Forum:

This site may earn a commission from merchant affiliate links, including eBay, Amazon, and others.
Stickers!

... While on the subject of "What to put on the Truck", a couple of my friends have suggested a couple of stickers that should go on it:

Sticker_3_-_Z_O_R_V_.PNG


Or:

Sticker_2_-_In_case_of_Zombie_Attack_.PNG


Or:

Sticker_1_-_Torque.PNG


What do you think?
 
Underneath upgrade!!

Hi all,
Been tarting up my old truck, but thought it would be good to make sure it was as "pretty" underneath as it now is up-top.

Looking around the edges, there were a few points of concern...

Front rotors:
Front_Rotor.jpg


Radius Rods:
Radius_Rod_2.jpg


So, when I was offered a 1994 D21 4WD 2.7D Series 2 for not a lot of money, I grabbed it:

1994_D21.jpg


This will be my donor car. It is post-1992, so there are some differences between it and mine. I plan to pull all of the steering/suspension mechanism of the 94 and put it on my 90.

Here's my truck, waiting for some attention:

Coming_apart_1.jpg


The plan (as far as I have one at this point) is:

  • New (lightly used) rear springs (Ironman), poly bushes and greasable shackles.
  • Heavy-duty torsion bars,
  • Monroe Gas shocks,
  • All the 94 bits on the 90 (including the steering box),
  • Swap the single-pot front brakes out for twin-pot brakes from a Terrano.
  • Replace mounts/bushes in the front.
  • Replace the driveshaft centre bearing.

And so phase 2 begins...
 
And so it begins...

Up on stands, and started pulling it apart.

Coming_apart_1.jpg


Ripped the donor truck to bits and measured, cleaned and inspected each bit as it came off.

Donor-car_sheds_its_goodies.jpg


This truck has had some replacement parts fitted in the not-too-distant past, so a fair bit of it is good to go as-is. What fails inspection is put aside and gets added to the shopping list.

The rotors weren't bad on the 94 truck, but I had already purchased new rotors, so I fitted them to the 94 hubs. Ooooo - Shiny!

New_Rotor_2.jpg


I decided to replace the standard single-pot Navara calipers:

Brake_upgrade_-_From_1-pot_Navara_to_2-pot_Terrano_-_3.jpg
 
- with twin-pot calipers from a 1998 Terrano (KH WBD21)

Brake_upgrade_-_From_1-pot_Navara_to_2-pot_Terrano_-_11.jpg


.. adding "a set of new front pads for an 89 Terrano" to the shopping list.

The shopping list is quite long now, so I have placed the order and everything will stop until they are delivered.. Oh, how I have come to LOVE the phrase "Ex-East".... :yeahright:

Still - Onwards and upwards!


Huge thanks to Peter for his remarkable efforts in making this all happen and to cwolf for his advice & encouragement.

:cheers!:
 
These will go on to keep the hubs from falling off! (YES - I did get 2 sets).

Ball_Joints.jpg


I also got these:

Repair_Washers.jpg


.. to fix up the oval holes in the chassis. They just weld on each side.

I KNOW I could have knocked something up, but these were available and come with a guarantee....
 
Good job Chris making some good progress there.
It's always refreshing to see someone willing to give an old girl
a new lease on life instead just trading em in for something new.
 
I cleaned up the chassis mounts for the radius rods and had the repair washers welded in. This changed it from looking like this:

Radius_rod_hole_in_Chassis_-_in_need_of_repair_2.jpg


.. to this:

Washers_on_3.jpg


The Radius Rods were a bit sick -

Radius_Rod.jpg


.. so I took the ones out of the donor -

Radius_rod_from_donor.jpg


... and these were MUCH better. Still damaged, but not bad at all.
 
I then laid some weld over the worn part, put it in my lathe and turned the rods back to round. I checked for linearity and uniformity at the same time, with a dial gauge. They ended up looking pretty good -

Radius_rod_repaired_2.jpg


Picked up some uprated (26.5mm dia, in place of the standard 22.7) torsion bars - can't remember the brand right now...

Torsion_Bars_2.jpg


Waiting for all of the new bushes to arrive. Apparently, Santa doesn't deliver Navara bushes, so I have to rely on Australia Post.
After Christmas, then.
 
G'day Chris, great work. Don't know how I've missed this thread so far. My D21 has sat lonely in the shed, unloved for the last 12 months. Hoping to get it back on the road in the next few months, but not doing anything as big as this job. Really impressed with what you've done. Keep it up.

Oh, and thanks for the part numbers for the plastic door bits. Trying to sort them out has been a pain the butt.
 
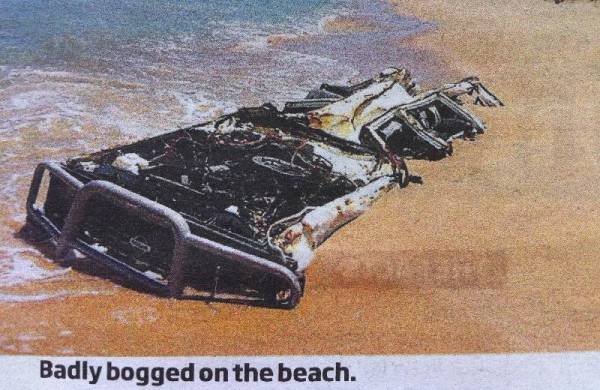
Progress (well, a little progress, at least)

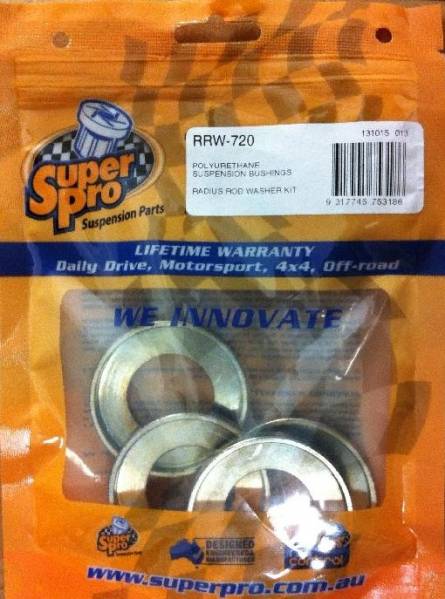
HOORAY! The bushes arrived!!!
Woo-Hoo.

Then I had to remove the old bushes.
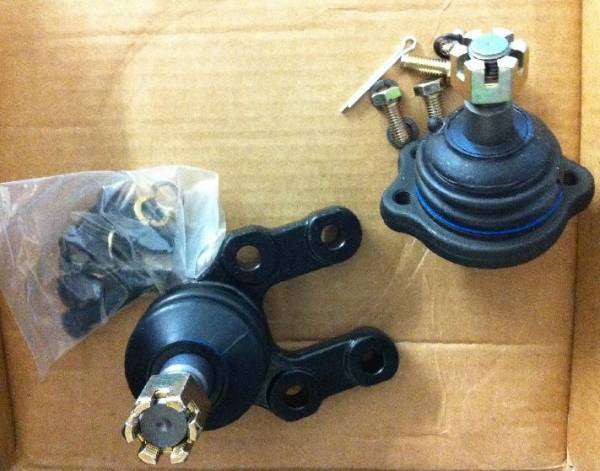
UPPER CONTROL ARMS - easy. Before hitting them with drill or flame, I squirted CRC into them and just pushed them out. As I said, easy!

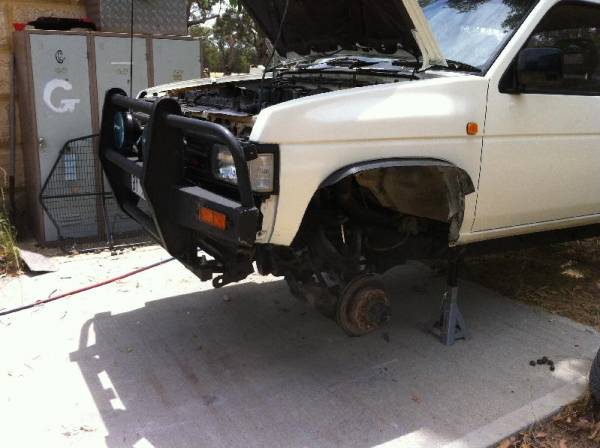
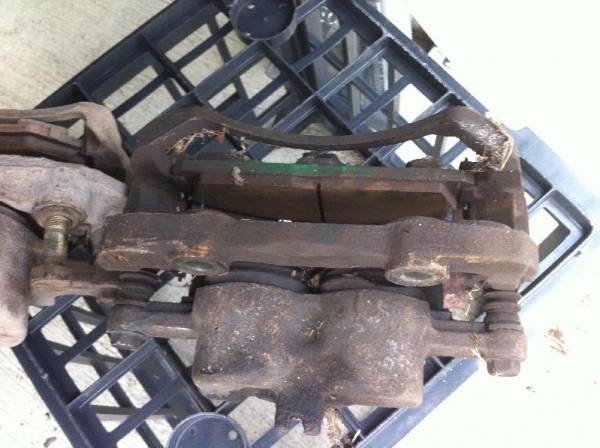
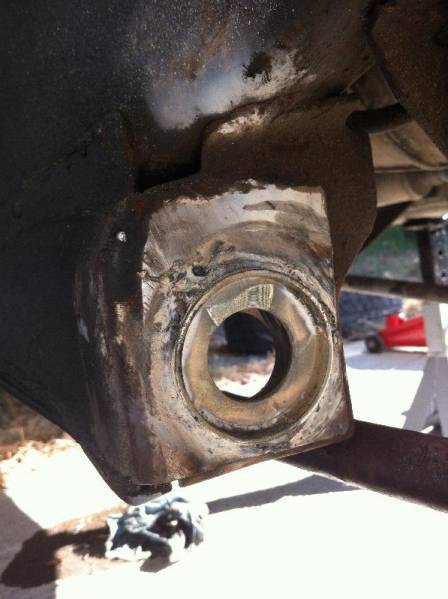
LOWER (FRONT) CONTROL ARMS (in the front of the chassis) - I don't like these. Not at all.

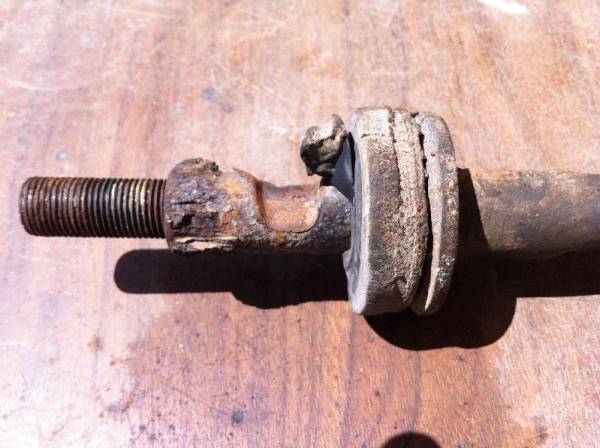
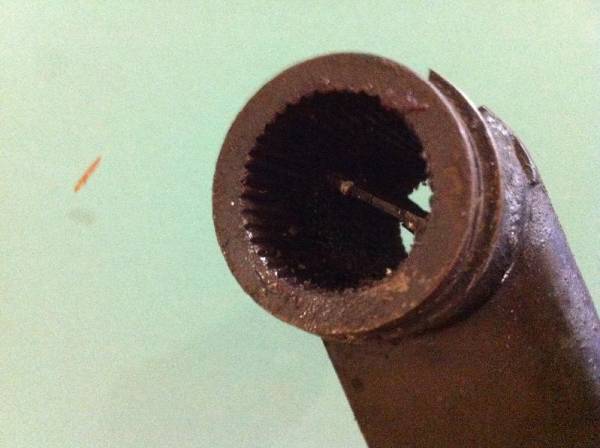
I made a press from a piece of thick-walled tube (cut off an old tow bar) and a bit of 6mm plate welded across the end, with a hole for a bolt in the middle. This got the centre bush out, as well as some of the rubber. I thought about burning the rest of the rubber out, but decided to put a rotary wire brush in my pistol drill and that worked a treat.

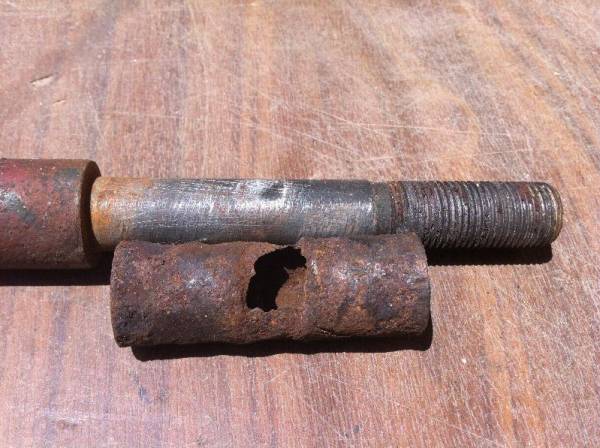
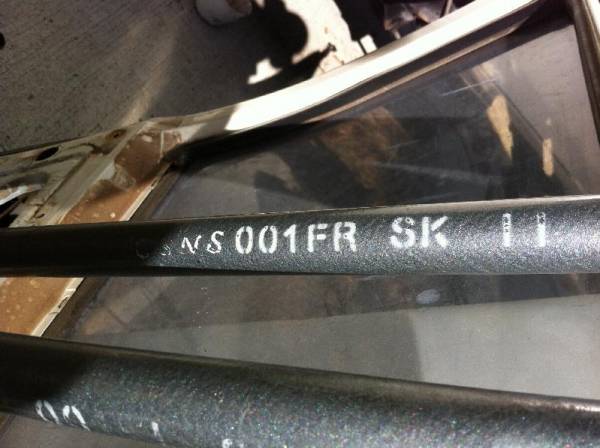
I opened the pack of new bushes and discovered the ones I bought require the REMOVAL of the outer tube as well. D'oh!

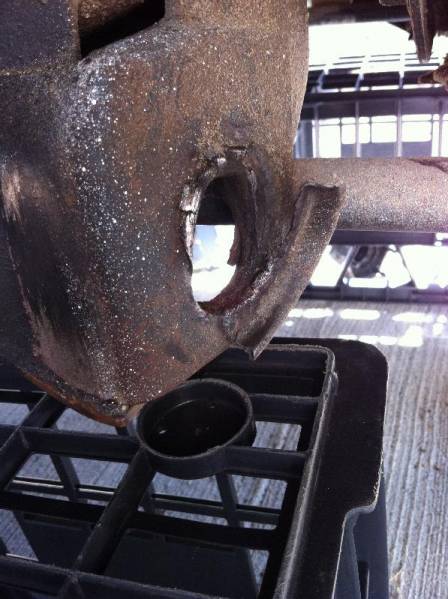
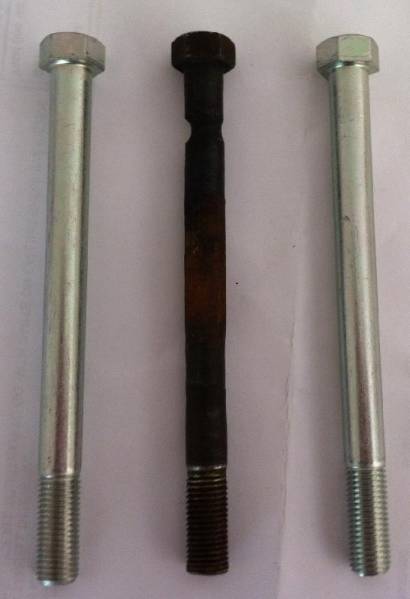
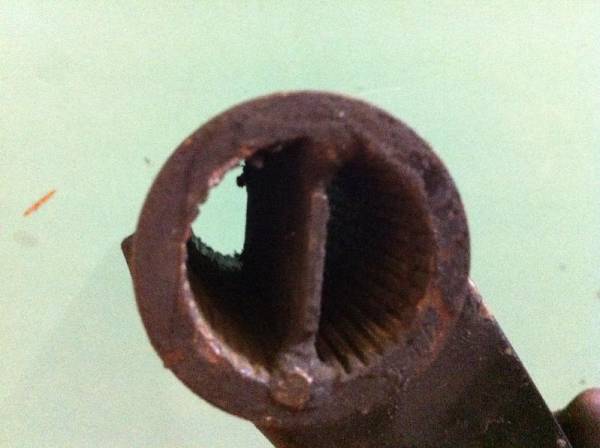
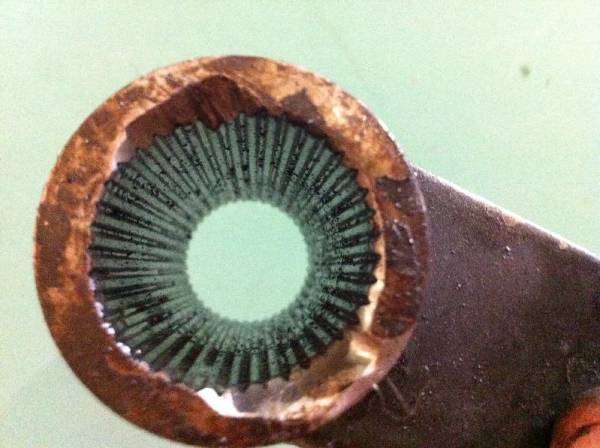
I turned a piece of 8mm plate to the exact size of the bush in my lathe and used a huge socket and a bolt as a press. Total failure - the tube would not move. Attacked it with the air chisel and 10 mins later there were a couple of bits of mangled steel tube on the floor and a couple of holes that the new bushes would fit into. Lots of Lithium grease and the new ones went in.

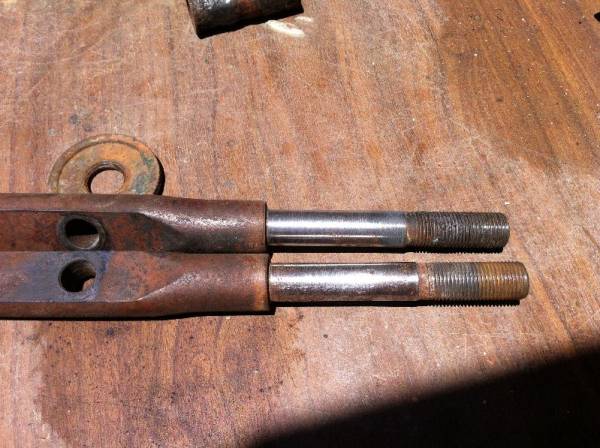
Hooray! Reassembly can begin!

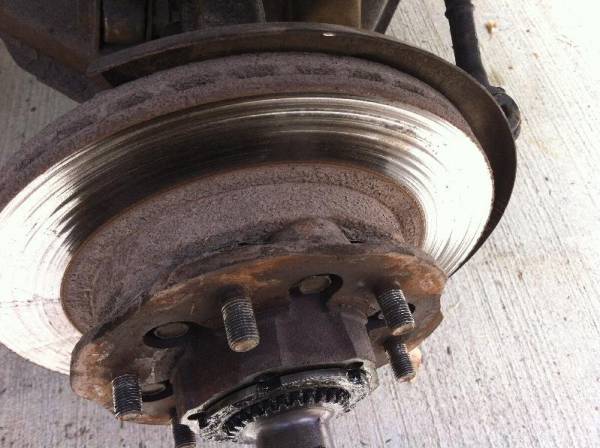
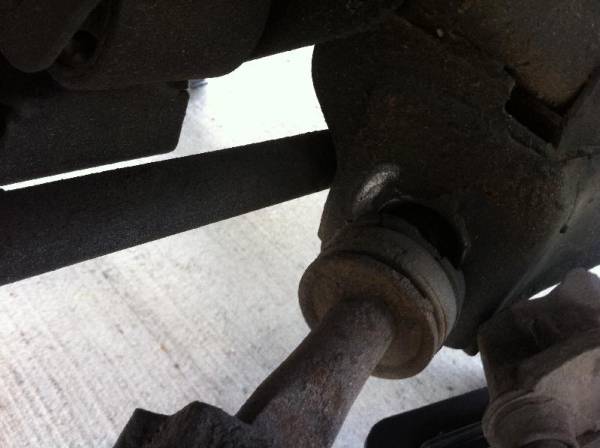
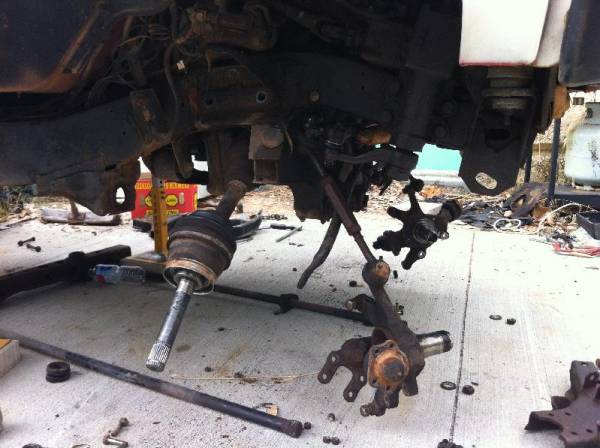
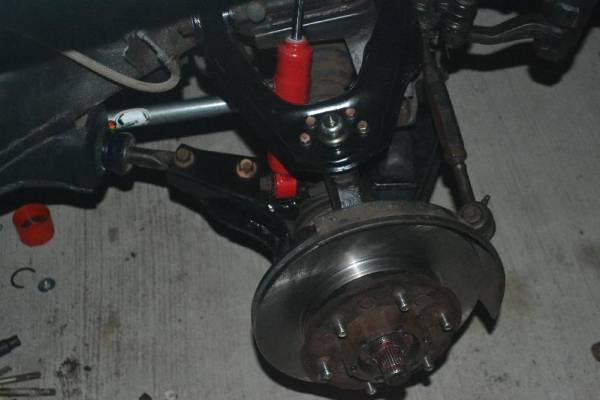
Fitted new bushes in both control arms and loosely bolted them up. Bolted the driveshafts on and then noticed that the nearside driveshaft bearing in the front diff was rather sloppy. The bearing allowed a couple of mm of up/down travel, which was a couple of mm too much....

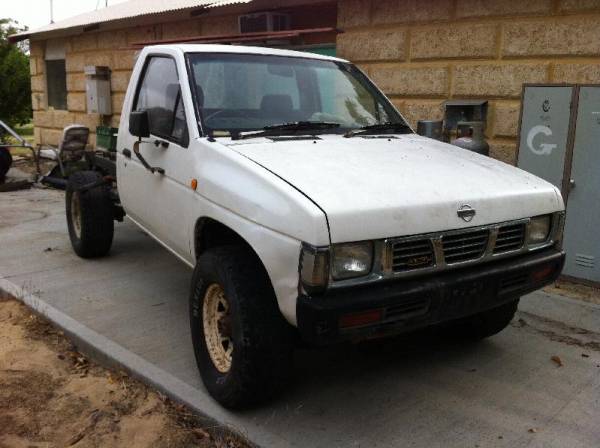
Checked the diff in the parts truck and it looked great.
Dropped the front diff and cross member out and swapped it over with the diff in the parts truck. Put the driveshafts on (again).

The day was hot, so we worked in different areas of the truck, basically following the shade. Noticed the diff in the parts truck had an 80L Diesel tank, whereas mine had a 60L, so I began unbolting it. Not out, but started...

While around there, I removed the centre tail shaft bearing and replaced it with a new one. I ripped the shocks off and cracked all the nuts on the rear leaf springs, ready for the Ironman upgrade.

I removed the tow bar (I have a MONSTER bumper to go on - this has an integrated tow hitch and will also carry the spare-wheel carrier - once I make the spare-wheel carrier and mount it) and discovered it was W-A-Y past beer O'clock, so we called it a day and drank beer.

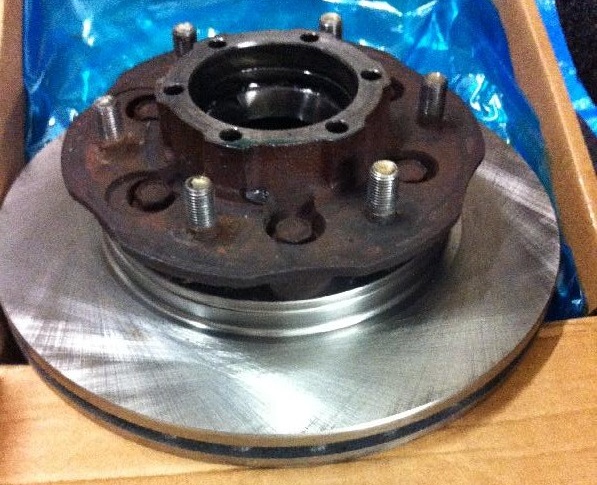
Now waiting on hub grease seals (from Nissan - Ex-East) before we can get the rest together.

Maybe only 25,000 hours left and it'll be drivable... :rambo:
 
G'day Chris, great work. Don't know how I've missed this thread so far. My D21 has sat lonely in the shed, unloved for the last 12 months. Hoping to get it back on the road in the next few months, but not doing anything as big as this job. Really impressed with what you've done. Keep it up.

Oh, and thanks for the part numbers for the plastic door bits. Trying to sort them out has been a pain the butt.

Cheers, for that. I am slowly getting it together and learning heaps in the process. If anyone reading this is in Perth (or surrounds) and you need someone who is great with a spanner and really knows these trucks, don't ask me... But, I do know a guy called Peter who has been more help than I can say. Peter can be tempted to assist with other projects for a few $$$ (but I get first dibs until mine is finished :big_smile:
 
Thanks!

Great write up Chris, good to see another D21 avoid the scrap heap :top:

Thanks for this - There is certainly years left in these old trucks if given a little love every now and then.

A friend of mine took his Toyota-thing (has Sahara on the back and lots of bits with ARB on it), with his off-road camper-trailer to the back of beyond, somewhere in NT. He told me about a river crossing that he only just scraped through and it sounded butt-clenchingly worrying...

He said that, during the crossing (with his front winch around a tree on one bank and the rear winch around a tree on the other), it occurred to him that he was putting about $175,000 worth of kit into a river, hoping to get it out the other side in usable condition.

I may not end up going on trips as "out there" as his, but I know that I can afford to lose the truck if it came to it. I want it good enough to get me to some interesting places, clean & tidy enough not to get stopped by the cops, reliable enough that I will (usually) get home in one piece and comfortable enough for me not to regret the trip after 50k's.

That's why I am doing all this.

And having a real ball in the process!
 
Bigger tank

Took both tanks out. The 80L tank in the donor truck was in pretty good shape, but rusty around the edges. One cup-brush wire-wheel in the angle grinder (plus a LOT of noise and a LOT of dust) and it looked clean. A bit of rust converter and then sprayed the whole tank with underbody sealer. This should protect the tank, while deadening it a bit when it wants to act like a drum.

If you decide to swap a 60L for an 80L, there are a few other bits you'll need to get from the donor truck. The 80L tank is longer. The 60L has the front mount bolted on one end to the off-side chassis rail and you'll need to take that off - keep it with the 60L in case someone wants it. The 80L mount bolts directly to the next chassis crossmember - 6 bolts - blow the holes out with an airline before use or you'll end up with arms like Arnie. Don't forget Loctite 243 on all the fixings.

You'll also need the bash plate (it is longer, too) and the bash plate centre-mount - single bolt fixing to the chassis rail and provides a single 8mm fixing in the centre of the bash plate. Mine was cracked around this point, so I fabricated an upgraded plate that will keep it all together and welded it in.

The rear of both tanks hook over the rear crossmember and affix the same.

Waiting for the paint to dry on the bash plate and that can go on.

As for the front-end swap - that is moving on a pace.
The bushes are in, control arms are on, the new ball joints are in, the uprated torsion bars are in, the Monroe gas shocks are in, the driveshafts are on (the broken bolt in the diff is out), the new rotors are on and new bump stops are on. The steering box is on (it is the one from the donor, as they are different) and the rest is progressing well.

Going_back_together.jpg


It is looking tight under there, but copious quantities of Lithium grease is keeping the squeaks at bay.

PHEW - Fingers tired now...
:rock:
 
Torsion Bar WOES!!!

OK - I got the torsion bars from a Terrano. Big, beefy and not used much.

What I didn't know is that there are two lengths of torsion bar...

The difference isn't much - 20mm - but what it means is that the torsion bar adjuster doesn't line up with the hole in the crossmember meant for that purpose.

I thunked and thunked on it and came up with a solution!

The torsion bar pushes into the adjuster on splines until it hits a small steel plate. This stops the torsion bar from moving backwards and, basically, falling out.

The plate is welded inside the adjuster, but only tacked in at one end:

Tacked_in.jpg


... and the other end of the plate limits how far the torsion bar can go:

Torsion_bar_can_only_go_in_until_it_hits_the_plate.jpg


SO...

I used my powerfile to carve out the two welds and punched out the plate.
This meant I had a splined tube that was MUCH longer than necessary.

Clean_splined_tube.jpg


I then measured how much longer the torsion bars were and trimmed down the plate to make the "socket" in the adjuster deep enough to cater for the longer bars. I welded the plate back in, filling the two spots I had removed material from before.

They want in, no slop, adjusters aligned just fine!

I plan to cut 20mm of spline from the old torsion bars, drill a hole through the centre and, once I have two, to bolt these to the truck somewhere. If I ever have to fit shorter torsion bars I can just push this packing piece into the hole first. It will locate on the splines (so it won't rattle about) and will fill up the 20mm space just nicely.
 

Latest posts

Back
Top