RustyNavs Tourer

Nissan Navara Forum

Help Support Nissan Navara Forum:

This site may earn a commission from merchant affiliate links, including eBay, Amazon, and others.
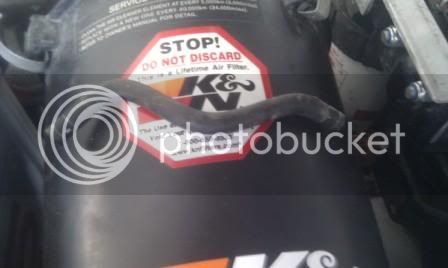
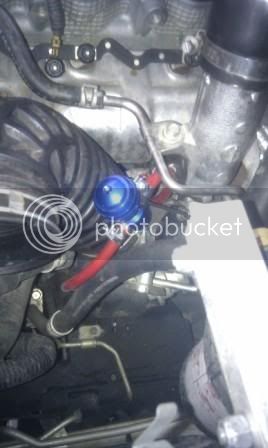
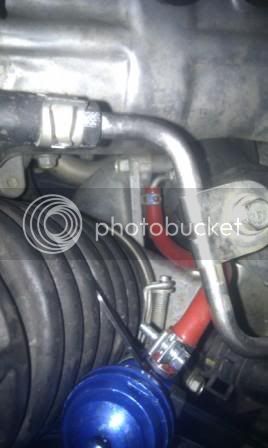
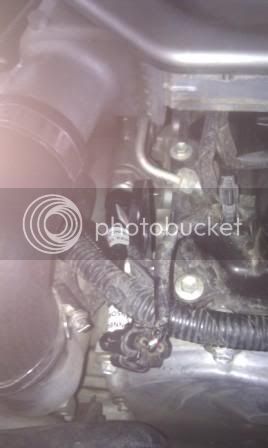
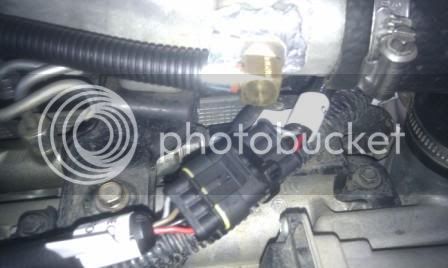
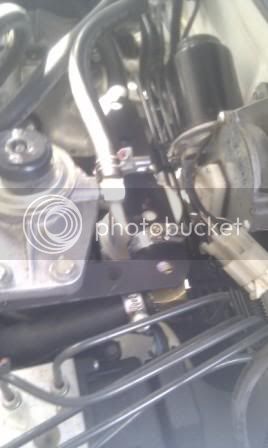
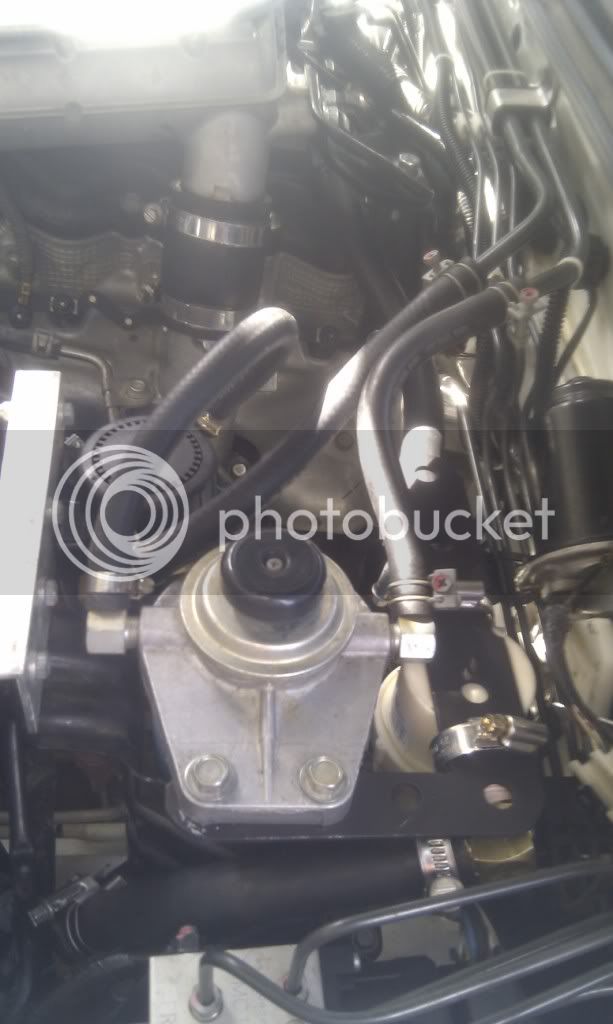
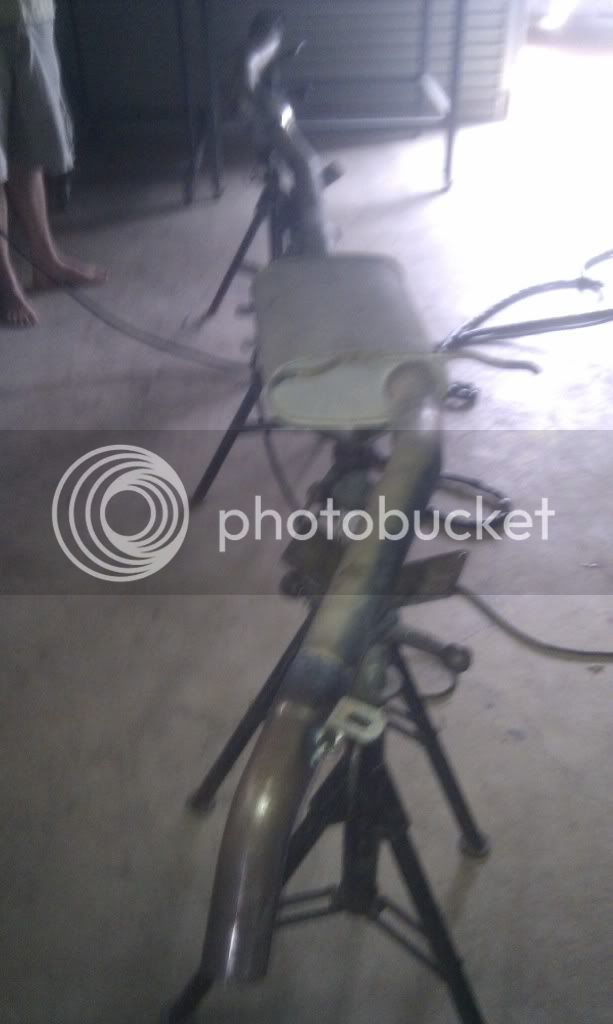
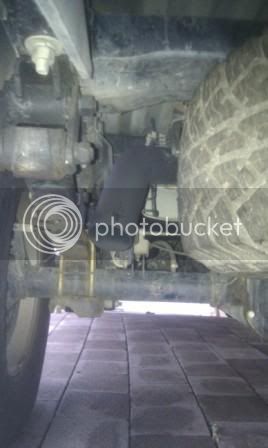
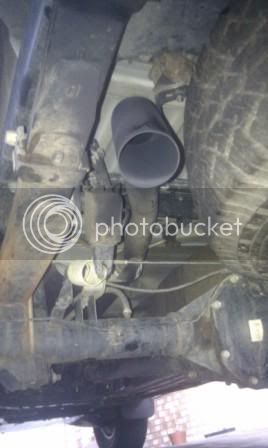
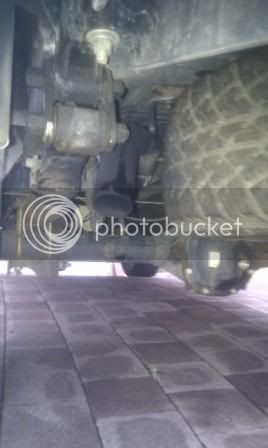
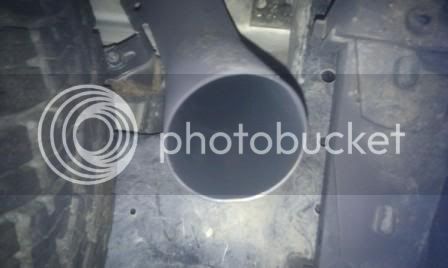
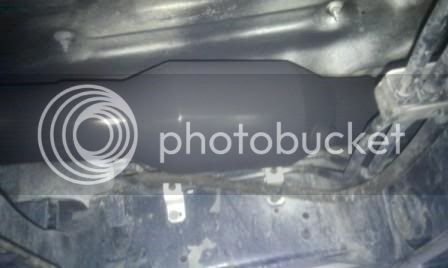
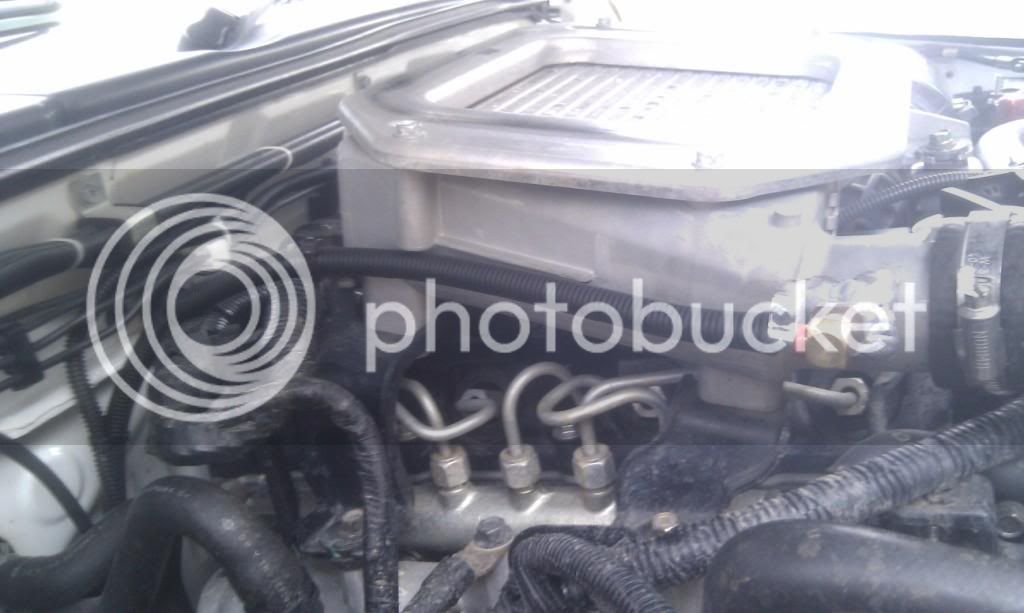
oh almost forgot. these pictures are how i tapped my boost gauge in. off the 07 onwards d22 top mount intercooler. i get a spot on reading of 15psi when i give it good right boot and gauge is real responsive from this location.
IMAG0252.jpg


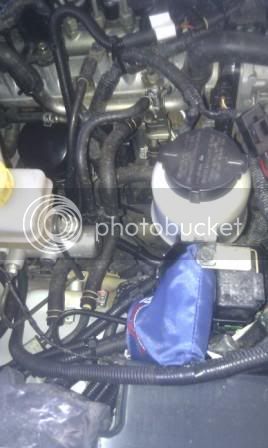
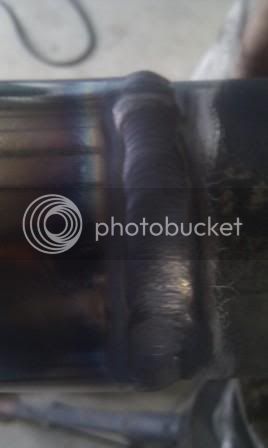
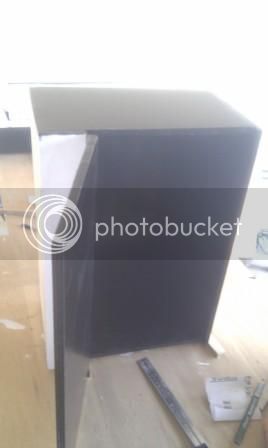
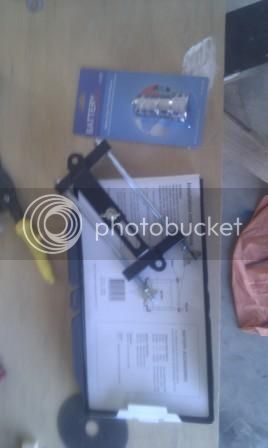
description of what it is and how it was run. everything is covered in split tube cause i like using it and it protects everything./ the silicone vacuum hose i used is a lil hard to feed trough a rubber grommet as it likes to stick agianst it. a lil inox solved this problem very quickly.
IMAG0253-1.jpg
 
was a busy busy day for me on my Rostered Day Off(RDO) from work. i started my lovely 2 weeks holidays and thought i better get shit sorted before i trvelled to noosa for a week on wednesday coming.

So i got productive and installed Boost Controller and set to 19PSI(little piece of info. if you unplug the MAF sensor remember to plug it back in before you try set the boost controller, limp mode doesnt really help), New custom heatshield went around my my new dump pipe(this was a b**** of a job), and the ChipIt chip went in finally. pictures will follow once photobucket catches up
 
ok firstly lets start with the controller. i used the same vacuum hose i used for the boost gauge line off the intercooler. its 4mm race spec vacuum line. 3m length was $26.99 from autobarn. i still had heaps left over from the boost gauge.

this is the original boost/vacuum line between port and wastegate
IMAG0265-1.jpg


new lines and controller installed. the controller has a small hole on one side of the unit and a large hole on the other. Large hole faces the wastegate and small to the port. for the 2 pieces comming off the port and wategate re use the old pressure clips. work perfectly. saves you $4 in clamps
IMAG0263.jpg

IMAG0264.jpg
 
now for the power maker. the CHIP. easy install but got confused cause there are to many plugs. here is what it goes in. Cuase we ahve a MAF sensor we do not use one of the plugs that has been added on the line. it is for MAP sensors only. i got confused a tthis part and had to call ChipIt hehe. anways

Part1 - remove and plug in the male and female plugs into the fuel rail itself
IMAG0266.jpg

Part2 - these 2 plugs came together already for me but are marked part B onto B. self explainatory
IMAG0267.jpg

Part3 - work out where you are gonna stick the ChipIt box Unit and run the rest of the length of wiring.. i ran it down a plug near the oil filter and run it across the earthing wire then up beside fuse box. this is what i came up with
IMAG0268.jpg
 
Part4 - if and only if you purchased the EGT Controller/Gauge from chipit you need to plug the harness into the plug supplied with the controller/gauge. mine ended up here
IMAG0269.jpg


it turned out to be spot on to what i wanted. keeping stuff tidy and not in the way all the bloody time. just remember to zip tie everything back onto something. the pack comes with a bundle of ties but is usually not enough so cater for more. the more the better for me i love using zips. OH and also tie back the controller unit itself you dont want it bouncing around and make sure you stick the beany and waterproof cover on it.

i also stuck the laptop integration cable up into the waterproof bag to offer extra protection.

Rusty
 
when i was under the car sticking a hose clamp on the heatshield around my dump i noticed that my secondary filter had water in the glass bowl. i got a lil shocked and quickly finished the clamp and grabbed my measuring cup and opened the bowl of the filter up to come across something liek this:

IMAG0272.jpg

IMAG0271.jpg


so we have diesel on top(clean), on bottom section where it is dark is water,dirt,grime,fluff,and other stuff. my Stanadyne filter which cost me $200 to install has saved me $10000 in repairs already. it goes a long way and i will be changing the filter in the next couple of months. its a small cost for a big repair bill.

Rusty
 
you have to change where you are getting your fuel Rusty

mate i cant remember where i filled it up from. and if its the usual place i have never had a problem from them. but i think it may have been somewhere else this time. the car hasnt been filled up in 3weeks and the tanks only 1/2 full with 400kms on the tank so far.

Rusty
 
another quick update on the car. first part is that when i installe the chip a had a nasty rattle/vibration and worked out it was the custom heatshield i put over the new dump i had installed. so that got removed and no more rattles. secondly i finally got my catch can installed. i purchased a small plastic catch can from MTQ Turbos Acacia Ridge cost me $99. bought a bracket and some fittings $50. and installed it sarvo.

here it is
IMAG0273.jpg

IMAG0274.jpg

so i fabbed a bracket to reuse the fuel filter bolts and also hold the catch can. 2 hose clamps hold it firmly in place and brass fittings and hose clamps hold the 5/8 oil resistant hose in place. was a simple task but it just took me forever. im a neatish freak
 
just updating on my catch can. just had a 5day break off with the wife up at noosa. 2hours drive from my place and we pretty much did most of the scenic places while we were up there, so we drove 500-600 kms including the trip up. the catch can caught well just lil bits. i wouldnt call it liquid it was more of a vapour/dusty/powdery content. so it is doing its job. so for a total of $150 including fittings,hose,bracket,catchcan,clamps i thought it was a good resolution to oil going back into my turbo. plus another reason to spend money on the Nav.

Rusty
 
Today the ironman bashplates went in. What a mission but worked out good in the end. Pictures will come eventually. I'm thinking of drilling in a service hole for the sump and then getting that area braced somehow.

Modifications were needed to make the front plate fit like a few cuts and bends and fiddling around and it went in

Pictures will come once I get time to put them on

Rusty
 
well shizzle thought i had posted pictures of the ironman bashplates on the nav. well i mustnt of. i just deleted them from my phone but not a biggy as they same as the rest of them. so they are fitted and sitting nicely and i had another productive day today sorting out the missing bits from my exhaust system that i got done. the cat was missing so have just installed a 100cell unit and also the exhaust hung a mile out the arse and was gonna end up smashed from 4x4ing. spent a few hours at my cousins who is a boilermaker by trade and SHIET did he do a brillaint job. while we had the exhaust off we found 3 exhaust leaks from dodgy welding and installed new gaskets and brackets. pics below

his tig welding on the car. man that stuff looks sexc.
IMAG0346.jpg


our lil setup
IMAG0343.jpg

IMAG0342.jpg
 
finished product. we ended up dumping the tip right at the leaf spring and it turned out MINT. perfect clearance each side so no more smacking wheel all the time. and the cat is neatly tucked away between 2 crossmembers.

IMAG0349.jpg

IMAG0348.jpg

IMAG0347.jpg

picture from underneath to show good clearance beside wheel and leafspring
IMAG0350.jpg
 
these pictures are what we cut off. the small section is about 200-230mm long and thats what cam out for the cat to go in. the longer section is easily 600mm of good pipe take the bend out you may ahve about 500mm left of useable pipe. all this pipe wasted when it could of been easily finished where i have done it. completely out of the way and sounds nicer on idle.

IMAG0354.jpg


oh and the cat - it is a s/steel cat but i had to paint it black. if it falls off it falls off. used exhaust paint and gave it all i nice coat. looks good until the next mud hole
IMAG0351.jpg
 
That is not too bad tig work for a boily, tell him to stick at it, he might make a coded welder one day.lol.
Better money and lots of fun to be had hanging shit on the boily/pipefitter.
Over here anyway.
Cheers
Charlie
 
Yeh mate he does a lot of steam pipe welding and patching using tig and he is teaching me how to do it aswell. Lots of practice for me.
 
alright i need some help with the next mod. i have done a list of everything i want to do to the nav. then i ahve gone through and marked the needs vs wants and well the needs list is bigger then the wants. my needs list is the list i would like to have complete before hitting the cape trip july/august this year. here is my list

Needs:
Sliders - scotty's
BodyLift - undecided to 1" or 2" also has to be done before the sliders are ordered
Suspension Upgrade - rear shocks and rear springs
Steering Dampener - do same time as suspension stuff
Fridge - obviously a must
Roof Racks - for cab and canopy
Awning
Solar Panel - to power fridge
Dual Battery System - yes still uncompleted as i have come up with a few more ideas

Wants -
OzTent 30 Second Tent - so easy
E-Locker - front diff
Rear Bar - hoping i smash the chrome crap so insurance will buy me a new one :D

HELP MEEEEEEE!!!!!

i was thnkin the 1"body and sliders as next go. then the fridge i will get at the 4wd show in brisbane at the end of feb. so that will be my solar/fridge sorted. then i will sort out my dual battery stuff and build my boxes to suit it.
 
well ive had a productive ish day. i was thinking of getting my suspension done but work over ordered on marine ply so i scored a full sheet of 12mm marine grade ply. this was a bonus as the suspension has now been shifted back a bit and the battery box and dual battery setup has come into play all in time ready fro the 4wd show in march where i will be getting my fridge and etc from.

so i decide to get into it. at this point in time i have got it all up to a prime coat and the doors/lid havent been installed yet. here is my pics

IMAG0363.jpg

door swings down on this as the stupid canopy brackets dont allow a lid to go upwards

IMAG0364.jpg

the front box is just for bits. just built it to fill in the space over the wheel arche. maybe it can house the spare gear like fuses and belts etc. undecided yet. but it has a lid that goes on top that just misses the 2 canopy clamps by 5mm.
IMAG0365.jpg

just another shot up close

IMAG0366.jpg

how it sits at this point in time. doors/lids yet to be installed. i am using piano hinge as its quiet strong and will give me a full length hinge across the ply.

now i had 3 options as a outside layer. 1. Carpet - good but pricey, but it would look nice. 2. Just plan old black paint - cheaper easy option and matches the black inside. or 3. the left over tubliner i have to make the orange peel effect on the box - i have 1L of this spray on tubliner left and will cost me nothing to do. plus i can touch up the bits that have chipped since doing the spray on

i went with option 3. cause i reckon it will look neat and also match in with the rest of the tub.

RustyNav
 
Ordered my carling rocker switches x6 and also a roll of 6mm twin core wire to do the sockets etc from the fuse block. Yet to get 6b&s wire and fuse block and mega fuses.

Should be neat when its done
 
a very unproductive dy on the box. i was hoping to get it fitted up today but it is gonna have to wait till friday now. i got the boxes painted in a gloss black on all surfaces that wont be seen. the insides are also gloss black just to keep it simple. friday ill mix up a small batch of tubliner spray and give the boxes a coat. also will get the tub drilled ready to install the fixings for the box. may or maynot have it ready for the weekend to janowen. even though i wont have anything to plug into it :(.

IMAG0374.jpg

IMAG0373.jpg

IMAG0376.jpg


also purchased the battery tray and battery clamp to sit inside the box. unsual it was cheaper then EBay.
IMAG0372.jpg
 

Latest posts

Back
Top